Instructions Guides Installing Water Filters
Installing an Undersink Water Filter System Instructions
Installing Your In-Line Undersink System - Instructions
Installing Your Undersink Replacement Cartridge - Instructions
Installing Your Undersink Inline Cartridge
Installing Your Replacement Reverse Osmosis Filters
Installing Your New Reverse Osmosis System
Sanitising Your Old Reverse Osmosis Unit
Installing Your New Ultra Violet System
Installation Instructions For Your In-Line Fridge Type Cartridge
Installing Your Whole House Filter - Instructions
Installing Your Whole of House Filter with Scale Reduction - Standard Size
Installing Your Shower Water Filter
How To Install Your Water Filter Tap
Can we install your filter?
Most of the water filters don't require any plumbing and are designed to be very easy for you to install.
We provide full, easy-to-follow instructions for you.
However if you want a handyman to come and do it for you simply let us know.
We have a network of recommended tradespeople we can connect you with.
If you get a larger filter, for example a whole of house type that requires plumbing, we also have a network of local plumbers.
Let us know if you would like to be connected to one.
These larger units are easy for any qualified plumber to fit. So if you already know a plumber then you could easily use them. (We provide full support in the unlikely event the plumber needs help).
To Change Your Undersink Type Cartridge

A) Turn off the water supply to the filter
B) Open the counter top filter tap – to relieve water pressure
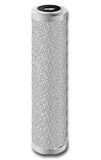
C) Positioning a bucket or bowl underneath - to catch any water spillage - unscrew the bottom of the filter housing and remove the old cartridge. This can be discarded.
D) Wash the housing thoroughly. Rinse well.
E) Place the new cartridge into the lower housing. Make sure that both rubber “ O Ring” seals are in place at the top and bottom of the cartridge ie fitting neatly into their slots.
F) With the cartridge in place screw the housing and top back together. Screw tight.
G) Once this is done turn on the water - ie at the saddle valve - and check for leaks. If there is a leak the housing should be tightened further.
H) Run about 2 gallons of water (approximately a sink full) to flush the cartridge.
Your water is now safe to use.
The cartridge will be good for approximately 6 months. We will email you a reminder
If you are away for anything longer than a weekend always flush the cartridge through on your return - as per (H) above.
Questions? Call us for friendly advice
Freephone 0800 009 6611


